Wednesday 28 April 2010
Start of the Model Book
· Rationale including selected audience translated into a working brief
· Project management schedule revised and updated
· Proposed methodology for production
· Chosen distribution channel
· Record of process through journal entries
· Evaluation of methodology used
After this is complete the last thing that is required of me on this course is to collate all my work into the correct folders and produce some high quality renders and i will be ready to hand in my work :)
I probably wont be updating my blog until i have some final renders to show everyone so keep checking back to see what i come up with.
Tuesday 27 April 2010
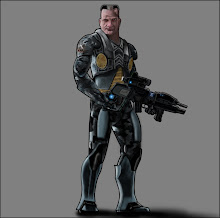
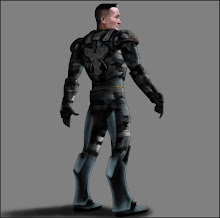
My character released to the public
Here is the link to the thread that i put up;
http://forums.epicgames.com/showthread.php?t=726629
In this thread there is a link to download my character or alternately here is the direct link;
http://www.filefront.com/16276699/GENERAL-MOLENAR-.UDK-and-.INI.rar/
Anyone reading this if you can leave some comments on the Epic Games forum thread for me i would muchly appreciate it, or i suppose you could always leave a comment here on my blog.
It would be good to get some general feedback off everyone and to know what everyone thinks about it out there.
Cheers
Ste.
Monday 26 April 2010
Character in Unreal Tournament 3
Here is my character actually in-game.


Here is my character in a Capture the Flag match;


My character is finally UT3 after 17 hours
The problem that i was having was in the .ini file which i will show below
Parts=(Part=PART_Head,ObjectName="GENERALMOLENAR.Parts.GENERALMOLENAR_Head",
PartID="GM",FamilyID="IRNM")
Parts=(Part=PART_Torso,ObjectName="GENERALMOLENAR.Parts.GENERALMOLENAR_Torso",
PartID="GM",FamilyID="IRNM")
Parts=(Part=PART_ShoPad,ObjectName="GENERALMOLENAR.Parts.GENERALMOLENAR_XShoPad01",
PartID="GM",FamilyID="IRNM")
Parts=(Part=PART_Arms,ObjectName="GENERALMOLENAR.Parts.GENERALMOLENAR_Arms",
PartID="GM",FamilyID="IRNM")
Parts=(Part=PART_Thighs,ObjectName="GENERALMOLENAR.Parts.GENERALMOLENAR_Thighs",
PartID="GM",FamilyID="IRNM")
Parts=(Part=PART_Boots,ObjectName="GENERALMOLENAR.Parts.GENERALMOLENAR_Boots",
PartID="GM",FamilyID="IRNM")
Parts=(Part=PART_Helmet,ObjectName="GENERALMOLENAR.Parts.GENRALMOLENAR_Helmet",
PartID="GM",FamilyID="IRNM")
Parts=(Part=PART_Goggles,ObjectName="GENERALMOLENAR.Parts.GENERALMOLENAR_NoMesh",
PartID="GM",FamilyID="IRNM")
Parts=(Part=PART_Facemask,ObjectName="GENERALMOLENAR.Parts.GENERALMOLENAR_NoMesh",
PartID="GM",FamilyID="IRNM")
Characters=(CharName="GENERAL MOLENAR",Description="He who dares wins! Grrrr!",CharID="GENERALMOLENAR",bLocked="false",Faction="Ironguard",PreviewImageMarkup="
CharData=(FamilyID="IRNF",HeadID="GM",TorsoID="GM",ShoPadID="GM",bHasLeftShoPad=true,bHasRightShoPad=true,
ArmsID="GM",ThighsID="GM",BootsID="GM"),AIData=(Tactics=1.0, StrafingAbility=1.0, Accuracy=0.5,FavoriteWeapon="UTGame.UTWeap_ShockRifle"))
In the above code i have highlighted the problem basically in the last bit of code the Family ID "IRNF" when it should of been "IRNM". So just because one letter in the code when i loaded up UT3 and went to the customize character screen no bosy parts would show up.
Sunday 25 April 2010
Just the character to import into UT3
Saturday 24 April 2010
Creating the Normal map for the Hoverbike
Here is the normal map created by Photoshop;
Here we can compare the Hoverbike with and without the normal map applied;
Creating the Specular map for the Hoverbike
Thursday 22 April 2010
Creating the Mini Gun Normal map
Creating the Mini Gun Specular map
Tuesday 20 April 2010
Creating the Assault Rifle normal map
Here is a comparison with and without the Normal map applied to the Assault Rifle;
Creating the Assault Rifle Specular
Sunday 18 April 2010
Creating the Head Specular
With the specular applied to the face this is how it compares with and without it on;
As with teh normal map on the face i didnt want the specular too high either just very subtle and im pleased with how this has turned out.
Creating the Head Normal map
Here is the actual Normal map that photoshop generated for me;
Friday 16 April 2010
Creating the Body Specular
Here is another comparison with and without the specular map applied;
Creating the Body Normal map
Here is a pic of the diffuse map destaturated and i have also altered the brightness and contrast on each layer as i see fit:
This is the Normal map that Photoshop produced for me and i was very pleased how it turned out, i seemed to have produced much better results.
If we compare the character model with and without the normal map you can see a massive difference. Without the normal map applied the body texture is very flat and with it things are really starting to come to life.
Wednesday 14 April 2010
Characters Body Diffuse completed
As well as creating the general diffuse i also need to produce a diffuse map for the red and blue team colours when i am importing the model into the Unreal Editor here are those diffuse maps i have created;


